04 April 2012

Coffee table with purpose made handmade tiles and glass mosaic tiles

Step One- the galvanised metal base

Step 2: Cut the fibre cement board to size 

Step 3: Attach fibre cement to metal base using a pop rivet gun

Glass has been glued over cut outs in sides and top.
Then the handmade tiles were made especially.
This corner had to be re-done as the original got accidentally broken

Went to the Tile House to buy glass mosaics tiles on special-
R45 per sheet

Start arranging the glass tiles- play around with designs

I used clear silicone to attach the glass tiles to the glass sheet

Making progress, and thinking about grout colour

Drying. Tomorrow I will grout the table and add a photo of  the final result on this blog post


19 March 2012

How to make your own mosaic inserts

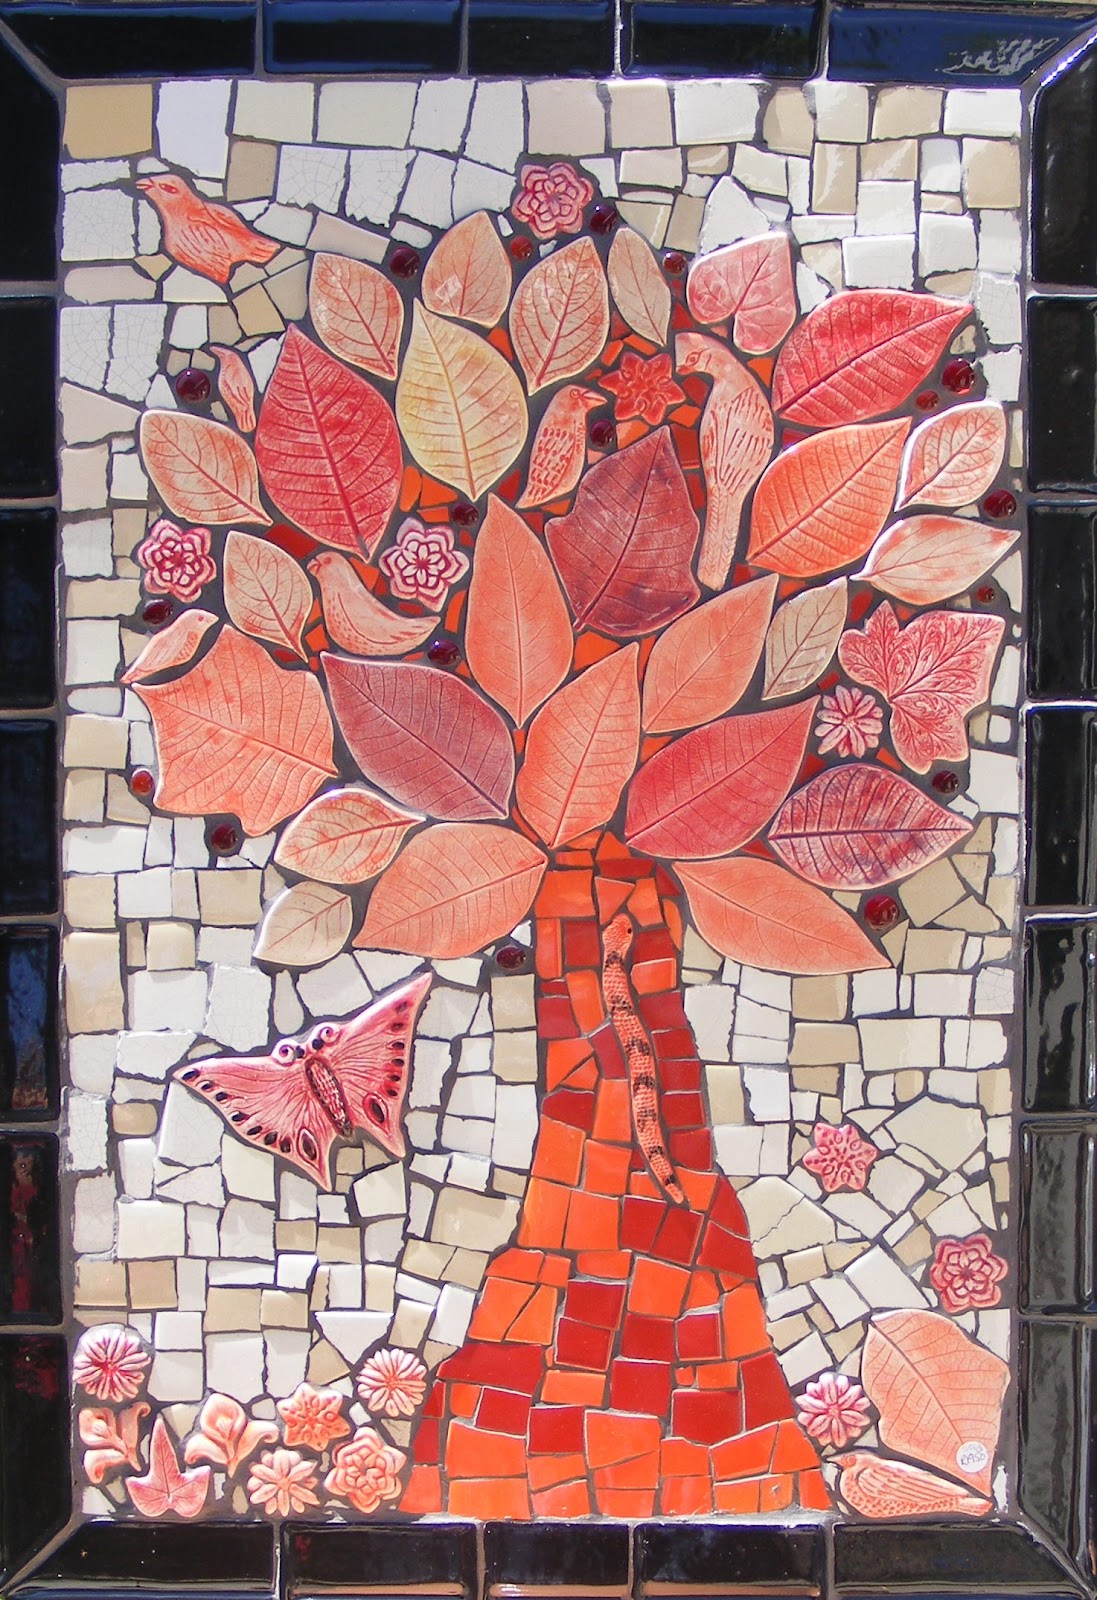
Butterflies, leaves and birds, flowers, a snake, broken ceramic tile, and glass drops.

I often get inquiries on the actual making of the mosaic inserts. Here is an excerpt from a lovely email I received a few days ago, and my reply:

Hello, Marylou! 
You don't know me, but I've been browsing your Earthmaid blog website and dreaming about your wonderful work! I especially love your mosaic inserts! I've seen many mosaic projects, and liked them, but your mosaic insert designs are what most captured my attention. After browsing your website, I went on a hunt to find inserts like yours -- I thought I would begin collecting tiles for a future project. However, I soon discovered that your tiles are one-of-a-kind! I couldn't find anything like them anywhere—either locally or even online. As a teacher, I recently relocated to a middle school. I'm excited because now I can explore many more art techniques and media with my older students. 
Your work has inspired me to learn more about working with clay. I have done many different art forms, including some basic mosaic designs with stained glass, but haven't done ceramic work—yet! On your blog, you describe how to do mosaics, which is wonderful! However, I am most interested in learning more about how you create the tiles themselves—the techniques you use to create the designs on the tiles. I'd love to try making some inserts for my personal use for mosaics—and I'm also imagining that they'd make wonderful pendants, too. I suppose that using polymer clay for pendants would work, but I would like to explore working with clay -- I wonder if my students could try the technique you use to make small projects, or if it would be too difficult. Would you be willing to tell me more about how you make your inserts, and the techniques you use, or point me in the right direction to find information via the internet or an excellent book resource? I am interested in purchasing some of your inserts, but I can well imagine that if I wanted to get enough for a mosaic project like the mosaic table you feature on your blog site, it would cost me a small fortune to get them to Canada! If you do sell them, I'd like information on how I could order them and the cost to purchase and ship them to Canada. Thank you so much for sharing your work through your blog, and I hope to hear from you soon!

I replied:

Thanks for the email and kind words.
If your school has its own kiln and pottery equipment, then making your own inserts will be a fun thing to do.

I would suggest you start by getting a slab of clay rolled out—about 6 mm thick, either on a slab roller or by using a rolling pin and 2 dowels. Get a book from the library on handmade tiles to see how to make a slab.

Then when it has firmed a bit, press cookie cutters into the clay. Or press leaves, veins down, into the clay. Cut with a sharp-tipped knife around the leaves. Or use a paper template and a knife to cut out animal shapes, hearts, or whatever. Remove the in-between bits, leaving the shapes on a wooden board (or bat, as they are called in pottery studios) to dry overnight.

The next day they should be firm enough for you to pick up and clean off the edges.

Then when they are dry, decorate and fire in a kiln.
I paint on the underglaze and then scratch through it to make designs—sgraffito.

I use plaster of Paris to make molds of the inserts I make, and that is another long process—but if I were teaching a class to kids, I would use the slab method.

Regards and hope you have fun.


There are many good "how to make tiles" books at the local library. Tutorials with step by step pictures will be helpful.

Tips for Working with Clay Leaf Shapes

  1. Eliminate Air Bubbles
    When rolling out your clay slab, take care to remove any air bubbles. These can cause cracks or even small explosions during firing. Wedge or knead the clay thoroughly before rolling it out to ensure a smooth, even texture.

  2. Handle with Care
    Avoid touching or moving the shapes while the clay is still soft and floppy. At this stage, it’s very fragile and can easily stretch or distort. Wait until it has firmed up slightly — to the “leather-hard” stage — before doing any trimming or refining.

  3. Keep the Shapes Flat
    To help your clay pieces dry evenly and stay flat, place a sheet of newspaper over them, then gently set a flat board on top. Add a light weight if needed. This prevents warping and keeps your shapes perfectly smooth as they dry.

  4. Refine the Edges
    Once the clay has reached the leather-hard or dry stage, use a damp sponge to smooth and soften the edges. This small step gives your finished pieces a more professional, polished look.

  5. Control the Drying Speed
    Clay that dries too quickly can crack — especially in warmer weather. To slow the process, cover unfinished projects with clear plastic. A clever tip: an old fridge (unplugged, of course!) makes an excellent storage space for clay work in progress, helping maintain consistent moisture levels.

Let Your Creativity Shine: Making Ceramic Mosaic Pieces

One of the best things about working with clay is how much fun you can have experimenting! Beginners and kids will enjoy simple decoration techniques like wax resist, sgraffito, or one-color designs. Sometimes, keeping it simple creates the most striking results — a little goes a long way!

Don’t forget about rubber stamps! Press them into your clay slabs when the clay is just the right firmness — not too soft, not too dry — and watch the textures come alive. Let imaginations run wild, but remember: supervise carefully, as some cutting tools are sharp. And save those little leftover clay bits for recycling — nothing goes to waste!

Once your leaf impressions and shapes are dry, decorating with underglazes is easy and magical. Apply the color, let it dry, and gently wipe off the surface — the pigment stays nestled in the impressions, highlighting every detail. Then comes the fun part: bisque firing at 1000°C, followed by a glaze firing. Choose translucent glaze for a glossy finish, or leave it unglazed for a lovely, natural matte look.

Pottery is full of surprises — even if you’ve been working with clay for years, there’s always something new to discover about textures, glazes, firing, and decoration. This blog focuses on mosaics, but I hope it inspires you to create your own beautiful, one-of-a-kind mosaic inserts.

P.S. If this post sparks your creativity, please share my EarthMaid blog with friends and family. Every view and comment helps — one day I hope to bring even more exciting projects to you with sponsorship support. Most of all, have fun, get messy, and let your creativity shine!

12 March 2012

Outdoor shower mosaic on a curved wall.

This post is about a project I completed a few years ago — a commission to mosaic a curved plastered wall for an outdoor shower and sauna. The client was wonderfully adventurous — by far the most daring yet! She told me, “I want something quirky and fanciful, and I want to notice something new every time I take a shower.” She even entrusted me with her personal collection of mosaic pieces, a small shoebox of interesting fragments, to incorporate into the design.

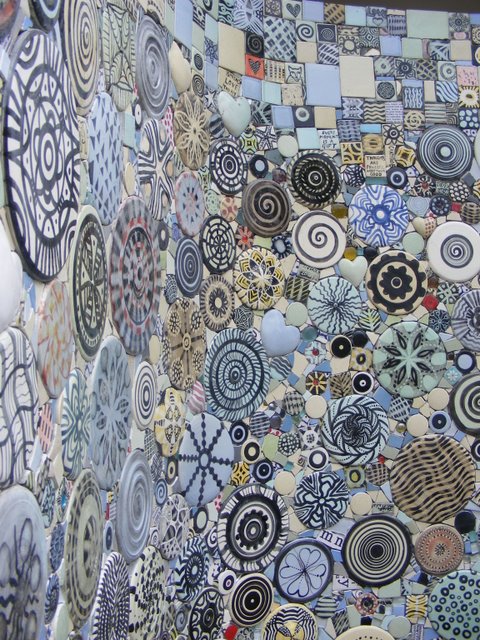
We began by creating a few tile samples in colors and patterns we thought she would love. Once everything was approved, the real work began: hundreds of handmade square and circular tiles were produced. Some of these tiles I decorated using a wax-resist technique, similar to batik textiles. The wax burns off during an extra pre-glaze firing, leaving the intricate patterns intact. After cleaning, the tiles were glazed in delicate light blues, greens, or clear glazes, giving the finished mosaic a subtle, shimmering charm.


5x5 cm tiles

small hearts and circles

Large plate sized circles, thrown on a wheel. Some were made to dry in a curved shape to fit the curved wall of the shower.

We also made many additional tiles in the same colors and patterns to fill the spaces between the circles and to be cut into smaller pieces where needed. Once all the tiles were ready, I prepared the wall with a key coat and bonding liquid and set to work on what would become a month-long mosaicing project.

The wall was set in a beautiful garden, and with the summer sun blazing, I rigged up a shade cloth to keep us cooler while we worked. My son joined me on the project, and I even paid him for his efforts—though honestly, we both enjoyed working together as a team.


I worked from the floor upwards.

the outside nook for sauna and shower

details

details

signed MN


As you can see, it was quite a task and kept me very busy for days and days.

The curved wall and circles create quite an illusion of flatness.

My son Julian has the honor of sticking down the last piece.

exhausted and dirty, but happy, finished grouting

I can hardly notice the curved circles on the curved section of the shower wall. Was it worth it?


26 February 2012

How to Mosaic a Garden Pot

I love a FREE materials project.  Or just one that hardly costs anything.


Upcycling Fun: A Free-Materials Mosaic Planter

I absolutely love a free or almost-free materials project! There’s something so satisfying about creating beauty from what others might call “junk.” For this project, here’s what I used:

Ingredients:

  1. An old cement planter, generously given to me by my mom.

  2. Key coat/bonding liquid to prep the surface of the pot.

  3. Cement-based adhesive for sticking tiles and plate pieces.

  4. Some old plates—also donated by my incredibly talented mom. These 15-year-old beauties were slightly crazed and chipped from years of use (dishwashers aren’t kind to earthenware!).

  5. Used white glass tiles, kindly donated by my friend Sandy.

  6. A few mosaic inserts I had lying around.

  7. Some old tiles salvaged from a 12-year-old mosaic project on wood (a cautionary tale—mosaics on wood rarely last, so don’t make that mistake!).


Method

I started by carefully breaking the plates into quarters using a glass mosaic cutter, then into smaller pieces. Keep the puzzle together as much as possible—you don’t want to mix up the pieces!

At first, I tried smearing adhesive directly onto the pot and then sticking the pieces on. It was messy. For the next batch, I applied adhesive to the back of each tile or plate fragment—much tidier and far easier to control.

The pot sat on a large turntable (lazy Susan), which makes mosaicing large objects so much easier. I highly recommend one—it’s essential for working comfortably on all sides. Covering the entire pot took a full day, working until the sun set and the mosquitoes came out to remind me of my outdoor status.


Grouting

Thanks to the turntable, grouting was far less of a back-breaking chore. There was even a little helper: a black-and-yellow wasp had made a nest underneath. He buzzed in and out while I worked, and we carefully respected each other’s space.

I added a touch of bonding liquid to the grout water for extra adhesion and got busy smearing it into all the gaps. Grouting is definitely messy work, but an important tip is to turn the pot upside down before finishing to fill in the gaps under the bottom edge tiles. I also cushioned the pot with an old dog blanket on the turntable to protect the edges—especially the delicate plate fragments.

The result? A quirky, upcycled mosaic planter full of charm, color, and memories.
 

A mosaic is only as strong as its weakest piece.


When the grout was dry, I used my Dremel tool to grind down the sharp edges on the plate. The plate has thicker parts and a curved edge, so it was impossible to get it totally flat. But I just made it work, knowing the grout and my Dremel tool would sort out the irregular and sharp bits.


11 January 2012

Ceramic Letters for Shop Fronts and How to Mosaic an Umbrella Stand

22cm tall letters in free font "off the drugs"
This was supplied to Baviaans tourism for their craft shop sign. The local crafters were going to complete it themselves. The sign was 4m long and about 35cm wide

Ruth's mosaic, using some of my fish and dolphin designs, in stock at the Knysna Pottery House
 Prepare the concrete umbrella stand with bonding liquid. Use the powder tile adhesive with some bonding liquid mixed into it- not the ready mixed kind

The completed umbrella stand
Grout with light grey grout, not white- which will get dirty and look grubby in no time.

Fish Mosaic Platter


The Knysna Pottery House is really a wonderful treasure house of ceramic things.  I needed a quick project  just to get into the swing of things. (And as usual, I am doing a new post about it, before the project is completed. So you might have to come back to this blog later to see the picture of the finished project. Just knowing that I need to update the blog with the completed project, makes me a little more inspired to get on with the job.)

Ruth and Craig Renwick are the two people who should get lots of credit for the Knysna Pottery House- (facebook page) an amazing, work from home, studio arrangement. They are always willing to help but are sometimes short staffed, so you might have to be a bit patient, and be prepared to look into the scratch patch and reject bin for inspiration.  Ruth showed me a ceramic platter, that was glazed underneath only. The top surface all ready for mosaicing.  Perfect!
I chose 3 of my fish tile inserts that the pottery house always has stock of and went home.

I found a box of my glass tile scraps and mirror pieces and started playing around with composition ideas. First, the fish needed to be broken in 3 places to fit the gentle curve of the platter. Otherwise there would have been a weak spot under them. Once I knew I had enough of the colours I wanted, I removed everything off the platter and prepared the surface by applying a coat of bonding liquid to it.

I started sticking down the pieces using the flexible ready mix  white tile glue

I got bored and wrote this blog, and now I have to finish this project.
Fish Mosaic platter in progress


Finished.

15 October 2011

Finishing the Leafy Mosaic Table Top

finished.


wow, it looks so bright and lovely at night!
The grouting is done and now so am I.
goodnight

02 October 2011

Leafy Mosaic table top, second stage

I used clear silicone to glue glass drops and ceramic pieces onto the glass centre. I will use black grout to fill the spaces in-between the glass drops.
I re-arranged the leaves. Tomorrow I can start glueing the pieces down. The edge tiles should be coming out the kiln now.
the black grout will change the effect a lot. be prepared for that.
A lantern hanging under the table, or a sunbeam will illuminate the centre of the table.
all ready to start sanding sharp edges and then sticking them down. This is the boring and slow part. I only manage small sections at a time. But doing things properly now saves a lot of hassle later.

Lots of work to do, and I am IMPatient, I dont want to wait any longer, I want to  finish this in time for the Leisure Isle crafts festival in 2 weeks time (I think)
Knysna Loerie Mosaic insert
details
the edge tiles are on, and the filling in begins.