22 August 2011

Mosaic seats for garden chairs

I have had 4 old wrought iron chairs for about 20 years and their wooden seats  had rotted away, rust was showing up under the peeling paint and they looked very sad and shabby. Time to "upcycle" some old furniture so that it will last another 20 years at least.


the chair with new seat but the same old paint job

the seat before grouting

shadows across the mosaic look interesting


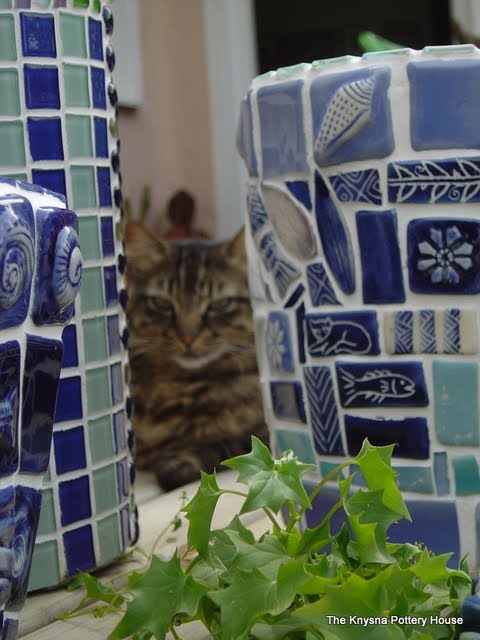
My inspirational red cat, surveying the scene

I tried various methods of preparation:
 1)The first 2 chairs i did by hand-  First I scraped and sanded off the old paint. (8 hours of slog)
painted with Hammerite paint. (special paint for metal)

2) Getting cleverer now- I took the last two to a local metal shop and they sandblasted and spray painted or paint dipped the chairs. He also re-welded two weak areas. They are as Good as new but the bill was R600 (ouch)

So at last I have my own 4 chairs completed with new mosaic seats. Since then I have asked a local artist John Ross, to make a beautiful wrought iron chair for display at the October Leisure Isle craft Fair, commissioned CXsteel to make a chair too, and adopted 4 chairs at the pottery house that need mosaic seats. All of a sudden I have 10 mosaic chair examples- of which 5 are already completed.

there are three more chairs like this that will also get mosaic seats, using green leaf inserts, birds, angels etc

the olive thrush likes it

I used 9mm fibre cement board, prepared with bonding liquid before mosaicing.  I use what ever I can find in the mosaic insert boxes at the pottery house, and combine them with reject tiles from the reject pile in the corner of the garden. I like to show what is possible with what is immediately available, often selecting some forgotten or unappreciated experimental handmade tiles at the bottom of the pile.

After the mosaic and grouting is all dry and complete, the reverse side of the Nutec/Fibre Cement board should be painted with a waterproof paint.  The chair will be able to handle sun, rain and storms.

I learned that 2nd hand chairs are the best and most affordable, and if you scrounge around you could find free cast iron chairs that just need some love. If you insist on a certain design, a local, artistic metalworker can make it for you, but this will cost a lot more.
I will add photos of the other completed mosaic seats when I do a follow up post... Have fun mosaicing.

28 June 2011

Fishy Mirror Mosaic Project

Annie and Frank from Germany saw my fishy mirror on the pottery house's website and asked me to make them a similiar one in a specific size for their holiday cottage in Sedgefield., South Africa.
Annie and Frank's Fishy Mirror
It took me about a week to make it, but that was only working on it a few hours a day,
First I had to nag and nag my husband to cut the board with his angle grinder.

Then, once that was achieved, I used a rasp to tidy the edges and then sanded them off a bit.
Painted the Bonding liquid onto the Nutec board
Glued the mirror on to the board
Played around with composition of fish and glass nuggets


I used scrap mirror pieces also 3mm thick, which is easy to cut using the glass mosaic cutters.
and arranged the broken mirror around the fish mosaic inserts and glass drops.
Used the ready mixed white adhesive from Tylon to glue it all down
Finally once all was dry, it was ready for grouting.


Once the grout had started setting, I wiped off the excess, making sure to fill  holes in the edges and smooth down any messy bits on the back edge of the mosaic. Here is the mirror, just after grouting. It still needs to be carefully cleaned, grouting touched up if necessary. Then the back of the board must be painted, and  it will be complete.
 Not too easy to photograph a mirror as it reflects the colours in the room and the shy photographer.


31 May 2011

30 May 2011

Smashing broken cups and plates to make a mosaic


I have been collecting my brother John's beautiful ceramic pieces for years. Often they are things he would not approve of  me using as he does not sell many rejects- he smashes them, as his standards are so very high. I rescue some pieces when I can.  Of course I do have pieces that were once perfect too. Things do break.  After some effort, I trained everyone not to throw any broken thing away, although I still lost a few pieces due to family ruffians and ignorant people in my living space.

One quiet Sunday afternoon I started this project, but ran out of John's broken pieces. . I used one of my own pieces, a plate my husband had decorated and one of my earliest teacher Barbara Strauss's stoneware mugs ,  but had to stop and wait a month, before I could get some more beautiful shards from John's Swellendam studio.

I started by smashing them up with a hammer after covering with a thick layer of newspaper. I discovered later that the glass mosaic cutters worked very well on the pieces too. High fired porcelain is quite similar to glass.

I arranged them in squares and the design sort of developed from there. I glued them all down carefully. The 2nd batch of broken stuff I got via my mom included a stunning teapot which had a perfect lid.

Grouting this mosaic was quite daunting as the edges of the pieces are very sharp- and you might see bits of sponge still on the mosaic as the photos were taken while the grout was still drying. Not a good idea to fall against this mosaic- it could be very nasty. So it should be kept out of the reach of small children or wobbly adults.
cracked fish tea party

John's  perfect  and still entirely whole work can be seen on :http://johnnewdigate.com

25 May 2011

Baviaanskloof workshop

Mosaic Workshop in the Beautiful Baviaanskloof

The Baviaanskloof is one of South Africa’s most stunning natural treasures, tucked away in the Eastern Cape. This dramatic valley, flanked by mountains and winding rivers, draws everyone from 4x4 enthusiasts and cyclists to international tourists seeking a taste of the wild Karoo. To truly soak in the beauty of the drive, I recommend at least two days, as the scenery is breathtaking and there is lots to see and do.

While the middle section requires a 4x4, there’s plenty to explore for those in ordinary cars. I personally prefer starting the journey from the Willowmore side of the kloof. Be prepared to cross a surprising 73 rivers—a reminder of how rugged and raw this region can be, especially when heavy rains turn the arid Karoo into a wild, flowing landscape. Fortunately, there are plenty of B&Bs and guesthouses along the way for a comfortable stay.

I was there for the third Mosaic and Bottle Cutting Workshop with Solly Levy, a talented product developer contracted by the local municipality. His work focuses on sustainable product development for the Baviaans craft shops, and he is incredible at bringing out the best in everyone involved—including me!

I thoroughly enjoyed creating samples and teaching these warm, welcoming Karoo people. It was an enriching and inspiring experience, and I look forward to many more opportunities like this in the future.


our comfortable accommodation at Damsedrif, Baviaanskloof

the school bell at a isolated kloof community where we did the workshops


Here is Solly Levy teaching people how to finish off cut bottles into lovely drinking glasses etc

Lots of fun and laughter too

It worked!

Veros "restaurant  and take away"  quirky and fascinating spot, alongside the road through the kloof. The craft shop is opposite, so plan a stop here!

the beautiful craft shop- cob built

inside the shop

our prickly passengers

thorn craft- unique to the Baviaans area


a thorny baboon

19 April 2011

Mosaicing a rock for a doorstop using FREE materials

Many years ago, someone gave me this piece of a broken Ardmore ceramic vessel.

I treasured my shard of an extremely rare phenomenon in SA- a ceramic studio that became so famous and successful- their pieces sell for fabulous prices in galleries all over the world!  Finally- I got an idea as to what to do with my Ardmore shard. .I love the results!

I selected a stone that had a similar bulge as the one ceramic shard I had, painted bonding liquid on it and while that was drying, I cut up the shard into smaller pieces with glass mosaic cutters, carefully positioning the pieces of the crocodile and flowers back together, so that I would not struggle with a puzzle later.

I fetched my rock and started gluing the pieces on to it using ready mixed tile adhesive. Unfortunately the croc has no snout- so  I put a flower there instead. I was also careful to save the Ardmore signatures of the artists and to use those in the mosaic. I havent grouted it yet, but I am thrilled with the result and keen to do more of this type of mosaic- Re-cycling- instead of using bought stuff all the time.  Beginners should definitely start by recycling as it is almost free. Only the little bit of tile glue, and bonding liquid and grout used here.

I have been working on mosaic products for  3 skills training courses in the remote Baviaanskloof area of the Eastern Cape, so decided to try this idea, but NOT using anything fancy like a shard of Ardmore or an Earthmaid animal insert. No- it must be made of things that unemployed people can find for free.  I was given a box of things they can find easily. Big white acacia thorns, sharp. Old rusted tins and bottle tops, some old crazed ceramic bits, broken glass. Initially,  I looked at the box in dismay. I used the thorns  and bottletops to make some lovely things, it was actually great fun. (Nothing to do with mosaic though- more like craft from nature/recycling- another subject) The results will be sold from a little shop on the famous 4x4 route through the incredibly scenic and exciting Baviaanskloof.  Here is the link to the webalbum: webalbum Karoo Craft Workshops

 But here is  my attempt  at mosaic, using very basic found materials only:


:

And here is a picture of them grouted, as well as 2 other ideas I tried- one done with leather scraps and the other with ostrich shell etc.
ceramic shards collected from an old tip site

First Mosaics drying in Karoo sun


a teaspoon is bent to become a hook


ostrich shell and mother of pearl buttons


My Ardmore rock grouted. Finished off with a Dremel tool
so there are no sharp edges. It feels as good as it looks.