Making the Leaf Mosaic Pieces
Here’s how I created the ceramic leaf inserts for the mosaic.
I began by rolling out a smooth, even slab of clay, about 6 mm thick. It’s important to keep the thickness uniform so the pieces dry evenly and don’t warp during firing.
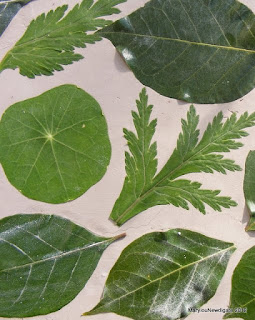
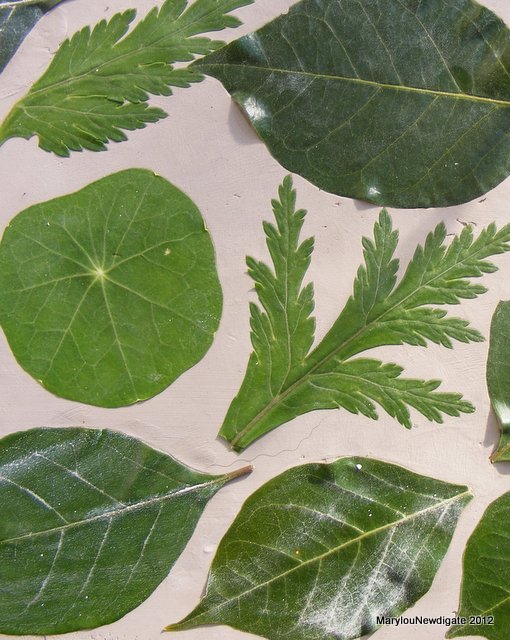
Next, I gently pressed fresh leaves into the clay surface to capture their natural texture and vein patterns. I experimented with a mix of foliage—wild geranium, nasturtium, bougainvillea, and cluster fig leaves—each one leaving its own distinctive print.
The variety of shapes and textures gives the finished mosaic a beautiful, organic look—almost like a patchwork of garden memories preserved in clay.

Once the clay has firmed up a little more—no longer sticky, but still slightly pliable—carefully cut around the leaf shapes using a pottery knife (or even an ordinary kitchen knife works perfectly well).
Then leave the pieces to rest overnight. Avoid moving or handling them at this stage, as the clay is still soft and fragile and can easily warp or lose its shape. You can place newsprint and then a board over the leaf tiles and weigh it down—but do not overdo it, just enough weight to prevent warping during the drying process
The next day, once the clay has firmed up past the floppy stage, gently lift the pieces and trim away the excess clay between the leaves—you can recycle those offcuts later.
Use a damp sponge to neaten the edges, keeping the actual leaf in place to protect its beautiful imprint from being wiped away.
Peel off the leaf and gently wipe the edges one more time.
Now it’s time to let the pieces dry slowly and evenly. Avoid drying them too quickly, as that can cause warping or cracking. Patience really pays off here!
Once dry, the pieces will be fired twice—first for the bisque firing, then again after glazing. You can choose to apply color pigments or underglazes either before the first firing or later during the glazing stage, depending on the look you want to achieve. Each option creates its own unique finish and depth of color.
I love the “surfboard” shape of these leaf forms—elegant, slightly curved, and so easy to handle. They nestle together beautifully on the drying board, fitting neatly side by side, ready for their transformation in the kiln.
 |
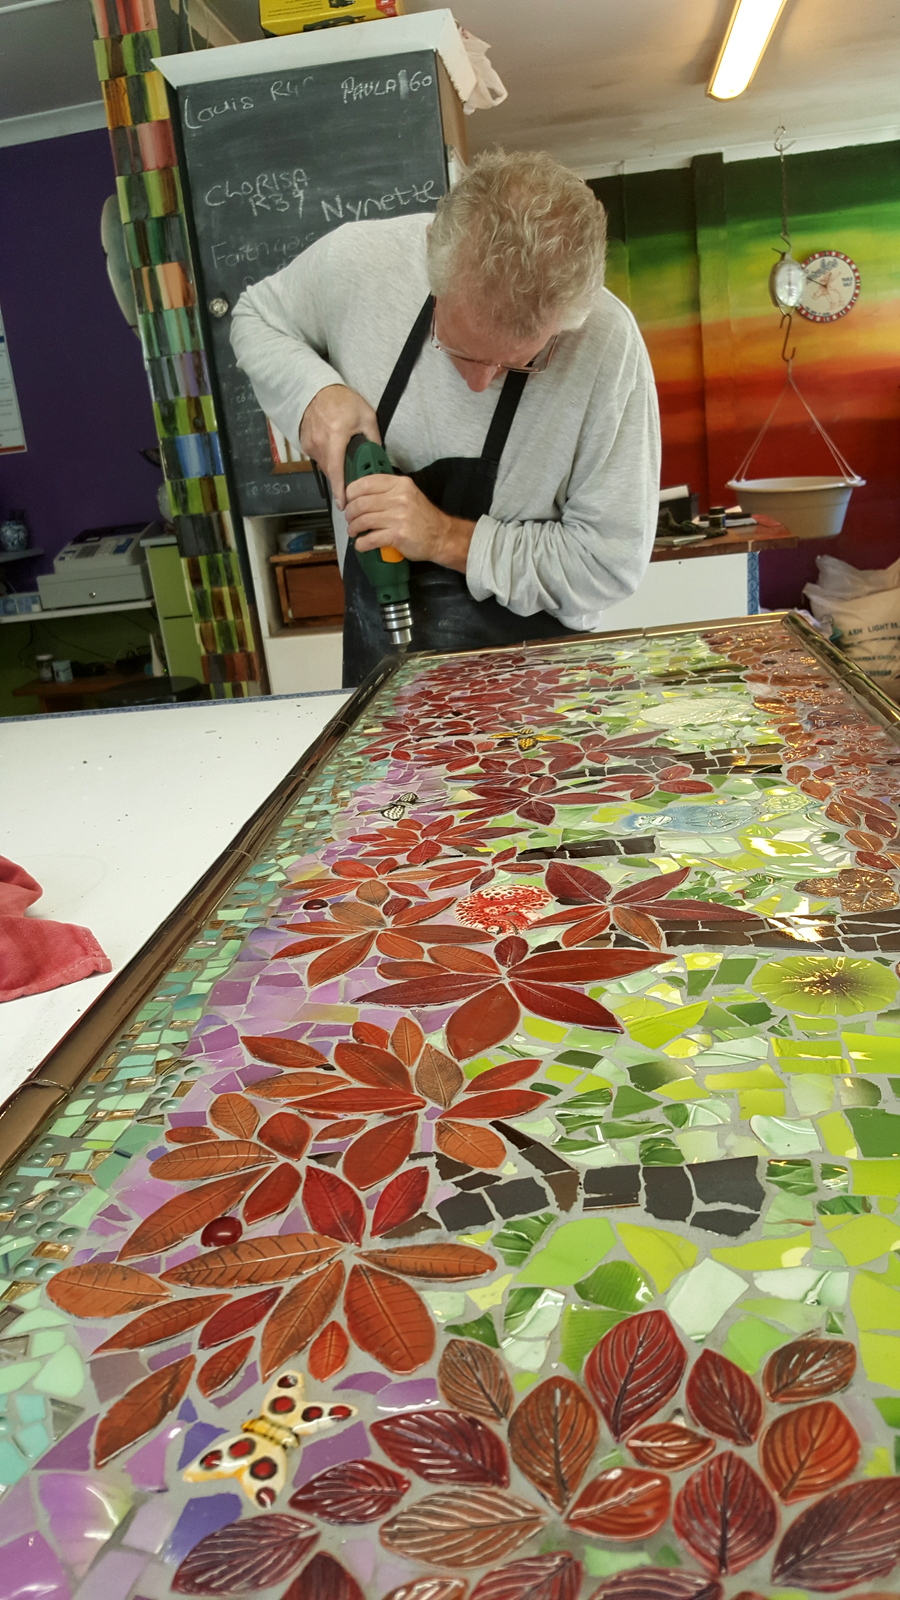
| Craig's Table |
 |
| My tabletop in progress |
 |
| Sally, my mosaic student, did well with her 2nd mosaic project. |
 |
| One of my first leafy tabletops |
 |
mosaic seat in progress, with red leaves, a cat, and
other bits and pieces |
 |
| Green glazed leaves over a brown pigment in the veins of the leaf detail on the tabletop |
 |
| An easy mosaic project, using leaf mosaic pieces in dove grey, blues, and mauve |
 |
| 'mosaic lessons' and various mosaic things decorating the outside of the Knysna Pottery House |
 |
| an owl and a hare with various odd leaf tiles that no one wanted |
 |
| More chair seats using leftover leaf mosaic pieces |
 |
| Sally, my mosaic student, is doing a fine job of an umbrella stand for her mother, who is the owner of one of my first leaf tabletops. So this umbrella stand will match it nicely. |


