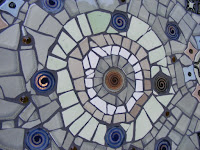
Once your pieces are glued down properly- and not able to be moved at all, you can begin grouting.
Make sure the mosaic is clean- no loose bits anywhere.
Mix the grout according to the instructions on the bag it came in. I add some bonding liquid- about 25ml to 250ml of water. This makes the grout waterproof and stronger- and you can also experiment with water based paint and pigments to tint the grout (if you want color). Finally, add the grout powder- usually it is about 3 parts powder to one part water. I just go by feel now- it is fairly forgiving stuff. Just make sure your mixture is firm and gelled before using. Definitely not sloppy and runny, or dry and crumbly. Add more water or more powder until consistency is correct and leave to stand for 15 mins before using.
Then get a sponge or spatula and just blob and smear it all over the mosaic. Wipe it into all the grooves.
Do NOT try and clean it too soon. BE PATIENT!! Wait 15 to 20 minutes and then clean off the excess grout with a DAMP sponge, not dripping. Try not to re-wet the grout. Don't go crazy cleaning at this stage. Leave it for another 15 minutes. At this stage one is kind of desperate to see the finished results so ALL beginners clean the grout off too soon. Then you end up with valleys or as I call them "dongas" between your pieces where dirt will collect and make your mosaic look grubby very quickly. If this does happen- you can re grout and enjoy the process all over again. Once the grout is level with all your mosaic pieces and dry, you can give it a final polish with a dry cloth and step back and admire your artwork.
If you have used ready mixed adhesive (not the cementy kind) you can use acetone to clean any remnants off the surface.


