
 |
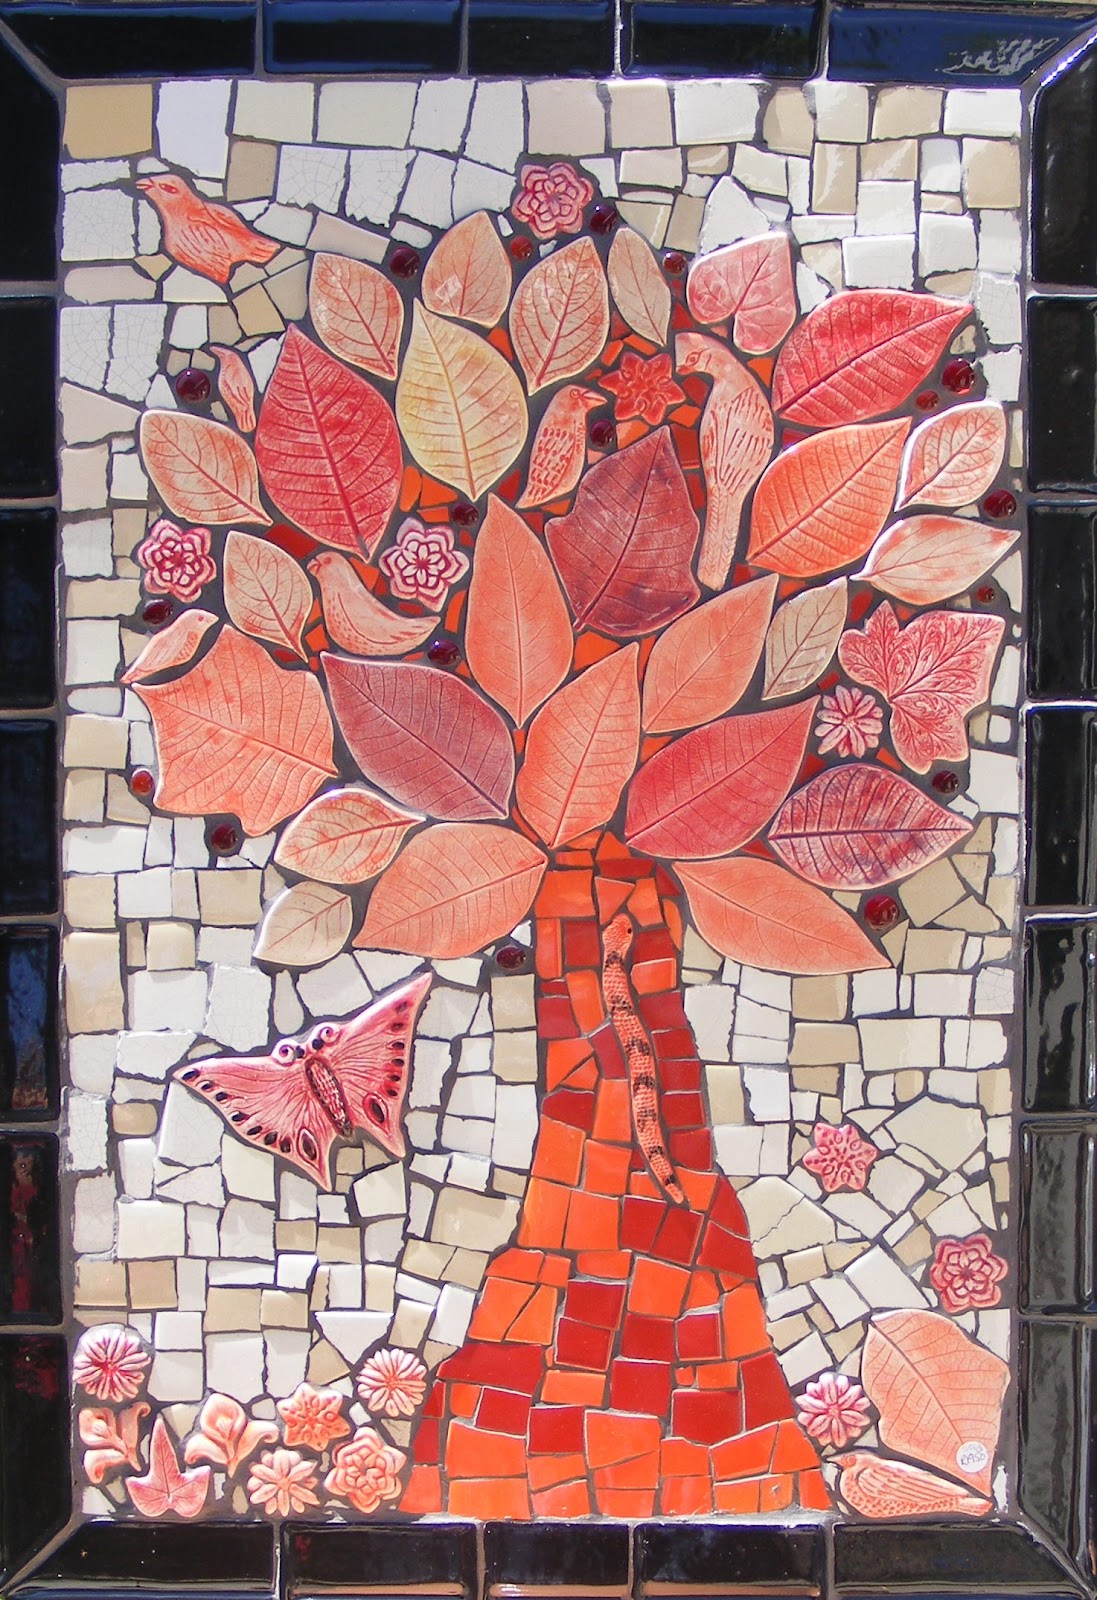
| Butterflies, leaves and birds, flowers, a snake, broken ceramic tile, and glass drops. |
I often get inquiries on the actual making of the mosaic inserts. Here is an excerpt from a lovely email I received a few days ago, and my reply:
Hello, Marylou!
You don't know me, but I've been browsing your Earthmaid blog website and dreaming about your wonderful work! I especially love your mosaic inserts! I've seen many mosaic projects, and liked them, but your mosaic insert designs are what most captured my attention. After browsing your website, I went on a hunt to find inserts like yours -- I thought I would begin collecting tiles for a future project. However, I soon discovered that your tiles are one-of-a-kind! I couldn't find anything like them anywhere—either locally or even online. As a teacher, I recently relocated to a middle school. I'm excited because now I can explore many more art techniques and media with my older students.
Your work has inspired me to learn more about working with clay. I have done many different art forms, including some basic mosaic designs with stained glass, but haven't done ceramic work—yet! On your blog, you describe how to do mosaics, which is wonderful! However, I am most interested in learning more about how you create the tiles themselves—the techniques you use to create the designs on the tiles. I'd love to try making some inserts for my personal use for mosaics—and I'm also imagining that they'd make wonderful pendants, too. I suppose that using polymer clay for pendants would work, but I would like to explore working with clay -- I wonder if my students could try the technique you use to make small projects, or if it would be too difficult. Would you be willing to tell me more about how you make your inserts, and the techniques you use, or point me in the right direction to find information via the internet or an excellent book resource? I am interested in purchasing some of your inserts, but I can well imagine that if I wanted to get enough for a mosaic project like the mosaic table you feature on your blog site, it would cost me a small fortune to get them to Canada! If you do sell them, I'd like information on how I could order them and the cost to purchase and ship them to Canada. Thank you so much for sharing your work through your blog, and I hope to hear from you soon!
I replied:
There are many good "how to make tiles" books at the local library. Tutorials with step by step pictures will be helpful.
Tips for Working with Clay Leaf Shapes
-
Eliminate Air Bubbles
When rolling out your clay slab, take care to remove any air bubbles. These can cause cracks or even small explosions during firing. Wedge or knead the clay thoroughly before rolling it out to ensure a smooth, even texture. -
Handle with Care
Avoid touching or moving the shapes while the clay is still soft and floppy. At this stage, it’s very fragile and can easily stretch or distort. Wait until it has firmed up slightly — to the “leather-hard” stage — before doing any trimming or refining. -
Keep the Shapes Flat
To help your clay pieces dry evenly and stay flat, place a sheet of newspaper over them, then gently set a flat board on top. Add a light weight if needed. This prevents warping and keeps your shapes perfectly smooth as they dry. -
Refine the Edges
Once the clay has reached the leather-hard or dry stage, use a damp sponge to smooth and soften the edges. This small step gives your finished pieces a more professional, polished look. -
Control the Drying Speed
Clay that dries too quickly can crack — especially in warmer weather. To slow the process, cover unfinished projects with clear plastic. A clever tip: an old fridge (unplugged, of course!) makes an excellent storage space for clay work in progress, helping maintain consistent moisture levels.
Let Your Creativity Shine: Making Ceramic Mosaic Pieces
One of the best things about working with clay is how much fun you can have experimenting! Beginners and kids will enjoy simple decoration techniques like wax resist, sgraffito, or one-color designs. Sometimes, keeping it simple creates the most striking results — a little goes a long way!
Don’t forget about rubber stamps! Press them into your clay slabs when the clay is just the right firmness — not too soft, not too dry — and watch the textures come alive. Let imaginations run wild, but remember: supervise carefully, as some cutting tools are sharp. And save those little leftover clay bits for recycling — nothing goes to waste!
Once your leaf impressions and shapes are dry, decorating with underglazes is easy and magical. Apply the color, let it dry, and gently wipe off the surface — the pigment stays nestled in the impressions, highlighting every detail. Then comes the fun part: bisque firing at 1000°C, followed by a glaze firing. Choose translucent glaze for a glossy finish, or leave it unglazed for a lovely, natural matte look.
Pottery is full of surprises — even if you’ve been working with clay for years, there’s always something new to discover about textures, glazes, firing, and decoration. This blog focuses on mosaics, but I hope it inspires you to create your own beautiful, one-of-a-kind mosaic inserts.
P.S. If this post sparks your creativity, please share my EarthMaid blog with friends and family. Every view and comment helps — one day I hope to bring even more exciting projects to you with sponsorship support. Most of all, have fun, get messy, and let your creativity shine!
This comment has been removed by a blog administrator.
ReplyDeleteHello Marylou
ReplyDeleteI love your mosaics. Originally I wanted to learn mosaics after a visit to England and seeing those beautiful mosaics on the church floors and crypts. However mosaic was not the thing at that time so I went into stained glass and eventually into kiln formed glass. Apart from my kiln formed glass and landscapes I also make mosaic birdbaths out of glass, cut and fused. I would love to make or find clay shapes that I can add to the birdbaths but the ceramic shapes are too thick for the 1/8" thick glass. Is it possible to make thinner clay shapes that would fit with my glass pieces?
Hi there
Deleteyes, inserts can be made to be thin, some- not all.. What is that measurement in mm? Your work sounds lovely. Porcelain inserts would be best for you as they would be stronger than low fired earthenware.
I have a Kiln and use earthenware slip and clay.At the factory we bought
ReplyDeletethe plaster and a glue or something I want to cast my own moulds but when I try my sample was stuck to the plaster after I have painted it with the rubber sort of liqued and my sample was stuck .With what can I seal the bottem of my to stop the casting from running underneath my opject I want to cast.Can you please help me with advice.My e-mail is martie.beukes9@gmail.com Thanks
Kind of hard to understand exactly. Firstly- I make my plaster casts using unfired raw clay. No release agent necessary. make sure it is placed flat on bottom of a tupperware container- and pour your plaster over it. wait to dry- its really dead easy. There must be lots of you tube videos on how to cast mosaic inserts.. One day when I find the time- I will do one also
DeleteYour work is amazing and your generous information is greatly appreciated. Thank you. I am inspired to make ceramic inserts for mosaic projects and to do some wall hangings for indoors on wood panels after sealing them. Could you suggest the right type of sealer?
ReplyDeleteThanks again for your inspiration!
Jacqueline Dunford
Marylou, thanks so much for your very generous explanations! You are amazing, love your blog, I am learning so much. I have not tried mosaics yet. I signed up for a workshop this month.(california) I wish I lived closer to your shop beacuse it looks delightful! Can you please tell me how to order some of your inserts?
ReplyDeleteThanks so much
Monica
Excellent .. Amazing .. I’ll bookmark your blog and take the feeds also…I’m happy to find so many useful info here in the post, we need work out more techniques in this regard, thanks for sharing.
ReplyDeleteMosaic Panels